THE SHORT ANSWER
Estimate ceiling fan installation from the selected models and verified support at each location. Separate assembly, mounting and checking, and treat box or wiring changes as their own scope.
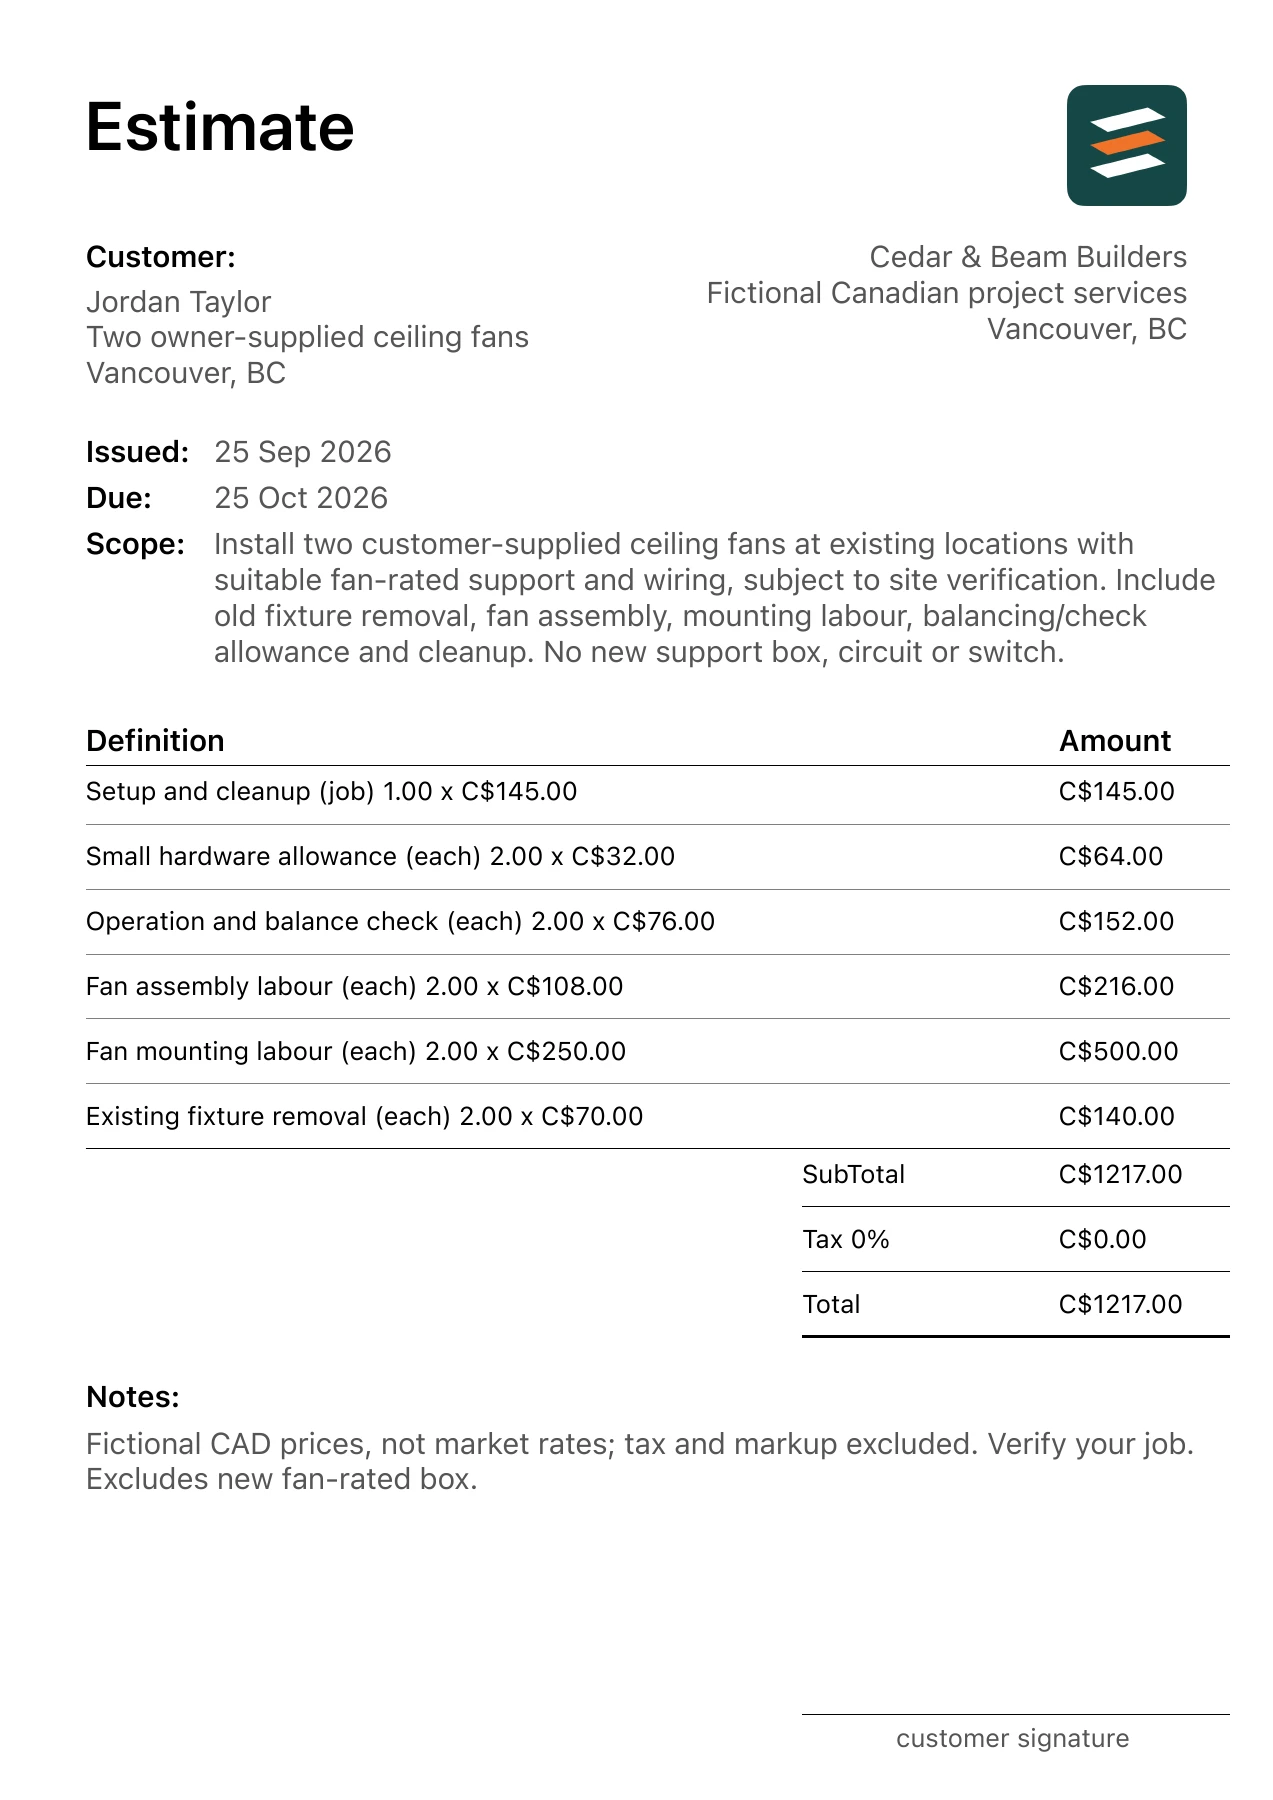
This guide follows a fictional two owner-supplied ceiling fans in Vancouver, British Columbia. The linked ceiling fan installation PDF example shows the scope and 6 separate costs in Canadian dollars. Treat it as a worked document, then use measurements, supplier quotes and labour inputs from your own project.
1. Identify model and location
Record fan size, controls, ceiling height and accessory kit. A selected fan model determines what components and assembly work arrive at the site.
2. Verify support conditions
The sample assumes suitable fan-rated support and existing wiring. Have the appropriate trade inspect those conditions before finalizing labour; do not price an unknown support correction as standard mounting.
3. Allow for assembly and access
Blade assembly and difficult access add handling beyond a simple light fixture swap. Keep the labour basis visible, especially at high or sloped ceilings.
4. Define the operating check
Record the limited balance and control check included. Assign old fixture disposal and any required local approval separately.
Review the Canadian project address
For the two owner-supplied ceiling fans in Vancouver, British Columbia, the example uses the measured trade units shown in its PDF. Residential jobs may mix square feet, linear feet, counts and supplier units; keep each line’s measurement basis visible. Confirm the existing wiring, mounting and access with the person doing the work. Check which approvals or inspections apply at the project address before the estimate is treated as final. The figures are fictional CAD inputs, not a local price survey.
Describe which products the customer supplies and which the contractor supplies. State how any site condition outside the visible scope will be assessed and priced. Do not copy an allowance from another city or assume a sample’s tax entry establishes the treatment for this client.
Work through the ceiling fan installation quantities
The matching PDF lets the client check each extension of quantity and unit rate. For this example, two useful checks are:
- Existing fixture removal: 2 each × C$70.00 = C$140.00.
- Fan assembly labour: 2 each × C$108.00 = C$216.00.
Adding all 6 lines gives a C$1,217.00 illustrative subtotal. The PDF records 0% tax and C$1,217.00 as its total, before any markup. These are chosen sample inputs, not prices observed in Vancouver, British Columbia. The measurement basis matters as much as the rate: a material purchase allowance may be larger than the installed area, while a fixture count is not interchangeable with hours of labour.
Check the scope before sending
- Record selected fan and controls.
- Verify support and wiring.
- Confirm ceiling height and access.
- Define operating check and old-unit handling.
Outside the illustrated scope: No new fan-rated box, wiring, switch alteration, ceiling repair, high-ceiling lift or fan purchase.
Check the business and client names, property location, dates, quantities, unit rates and notes. Confirm tax, markup and any required approvals for the actual job. If selections or site conditions are unresolved, label the line as an allowance and explain how it will be updated.
Common questions
Can a fan replace any ceiling light?
The existing support and wiring must be suitable for the selected fan. This example assumes they are verified before installation.
Is fan balancing included?
A basic check is listed; correction of product defects or unsuitable support is outside this example.
Open the itemized ceiling fan installation example and its app-exported PDF to see these decisions presented to a client. You can adapt the structure while replacing every fictional project input with your own.